First of all: what is a Serger (or Overlocker)?
It's a sewing machine who can also cut (and finish off) your seam allowances while you sew, saving your precious time and leaving clean and tidy all your seams.It's not difficult to use, you only need some practice and I hope you'll take advantage of my
E in italiano no? Read me in italian
1. Buy good quality thread
First time I've used my serger, it was already threaded from the seller (it was cotton, n°50): everything went smooth for a while, then I decided to change and use a polyester thread I bought, thinking it was better, stronger and ideal for the serger: nothing worse (probably quality wasn't one of the best)!
It started to broke on my upper looper and I've been re-threading for a whole afternoon: not that good, I started to think I wouldn't be able to use the serger without help (I've bought it online, it was a great deal but included a serging lesson only several weeks after receiving the serger).
Tip: I've found that the big store located 45 minutes from home has better prizes (and a quality you can touch by hand) than ebay good deals on huge cones (5-10000 yards), so better compare before buying!
SO: Please try changing the thread spools if you start experiencing multiple brokes!

2. Take several pics of the original threading
As soon as you open the box containing your new serger, open his "belly" and take some pics (with your phone is perfect, you'll have them always on hand when needed!) before starting to play with it: recreate the same threading will be a breeze!
SO: Do not procrastinate: take some shoot!

3. Learn soon to re-thread from scratch, not to knot and pull thread
Someone will tell you to start like this, but I think it's better to start your relationship with your new machine knowing her, and which better way to know it than learning to thread her? You'll be ready and not scared when (and it will happen) things will go wrong and thread will make a mess and broke!
BUT: When you're in a hurry, you can knot-and-pull, only please don't let the knot pass through your needle's eyes or you'll end with broken/bent needles...
4. A serger can't backstitch
Well, in fact it can... but you will not desire doing it, because it will cut your newly made stitches!
You have to leave long tails and fix the in some way (post full of pics coming soon), just NEVER cut chains near the end of the fabric, as my mother-in-law did with my Recycled Pajamas when came to my home and saw the tails dangling from LilPotato's sleeves (because she couldn't wait me to fix them, she had to wear her new pajamas NOW!) or the seam will unravel soon!
OR: you can turn your fabric and try to sew a couple of cm without approaching to your knives, but it's not a beginner's trick, believe me!
5. Never Sew on Pins (or at least put them far from the knives!)
This is a Rule!
I never baste (and my mother always turn up her nose when I say that) and often use pins (well, in fact, now that I'm a serger owner, I often sew without pinning too...) when I use my sewing machine, I often leave pins in and sew above them (I know, it's not good, but I'm so lazy
Do Not Pin At All
(It depends on what are you sewing, obviously!)But, if you pin, keep them far from knives or they'll probably loose their sharp (or, worst, broke)!

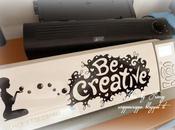
Can you see the pins? Hint: they're inside the black ovals!!!
6. (This is a savy/frugal tip)You don't really need to buy 4 cones of each color
When I started serging, I was worried about the huge quantity of thread I was going to buy: a serger uses a lot more of thread then a sewing machine, due to the fact he sews mostly with 3 or 4 threads. If you're sewing a (let's say) purple dress, you'll be worried to show white stitches when seams stretches, so you'll go to the store and buy ONE ONLY 10000 yds cone (because it costs less than the little spools you used to buy until now), to be put on the left needle, which is the most noticeable on the right side of the fabric; while you're at the store, buy some white and black and neutrals (grey, nude, pale pink, and so on) HUGE cones (you'll use them onto the right needle and the loopers, WHICH AREN'T SHOWING AT ALL on the right side of your dress!!!). Buying huge spuns, will grow your thread collection, you'll end with a lot of colors in no time and without spending a lot every time.
By the way: if you're sewing a cardi or a piece of clothing that will shows the inside when you wear it (or you have a lot of money): buy 4 cones of the perfect shade of your fabric
OR: you can buy one only cone on the perfect shade of color and make 3 bobbins to be loaded on needles and one looper (remember that loopers uses a lot of thread, so you'll end bobbins in no time!)

7. Create Your Personal Serging Book, using different colors for each thread an moving tensions around
This is a good advise: to learn which thread makes what, try threading your serger with 4 differents colors (using the same drawn on the machine makes things simpler) and start sewing; try moving tension around (marking down variations you made) and see what happens to stitches... You'll learn soon which thread stitches are from and which tensions change to make perfect seams, where looper's threads meets on the middle and nothing seems too tight or loose. If you want to do something smarter, you can write down the four tension numbers and pin a piece of scrap on the same page, showing the kind of fabric and the kind of stitch you used: you'll use it when, in the future, you'll need to sew the same kind of fabric...
I'd really like to see some Personal Serging Book, you can share your on SergerPepper's flickr group
8. A Serger goes faster then a sewing machine (a.k.a: don't push down your foot!)
You'll learn it the hard way if you start pushing down your feet: the serger goes A LOT faster and when you reach curves or angles it's harder to control where you're sewing and go out of way! Being a serger, you won't only sew on the wrong place: you'll CUT your fabric... and this is harder to be fixed!
SO: slow and steady wins the race!
9. Differential feed: my new friend!
This is a staple to have on a serger: it means we have two different feed dog, one in front and one right below your feet (well, not Your Feet, you'r serger's feet!!!); changing the ratio between the two speeds, you can sew different kinds of fabric and obtain/avoid different results (think ruffles!): it's like stretching or pulling your fabric while you sew.

Normally you have a knob or a switch that will let you change the number from 0,5 to 2,5 (or something similar, mine has a range 0,7-2): this is one more thing to sew and add to Your Personal Serging Book.

10. Clean. Your. Serger. FULL STOP
You can't sew with a serger full of lint: someone says you have to clean it at least every 3-4 hours of sewing: because of the knives cutting and cutting your fabric, your serger will soon change from a dream to a nightmare: threads and needles will start to broke, tensions will get worse, nothing will seems right.
It's time to spring cleaning: open your serger's belly, unthread and clean around with a brush, then with an air compressor (or a can of compressed air, like the one you can use for cleaning a keyboard). When all is clean: a couple of oil drops on every metallic connecting, then sew on a piece of rag just to be sure your oil won't go staining your good fabric!
HOMEWORK: Try to clean it a little every time you're going to stop to sew.
I'm collecting a lot of tutorials and free resources serger-related on my Pinterest board called: Serger You're mine HEHEHEHEHE! If you like the topic, please consider following it!
E in italiano no? Read me in italian
Sono io stessa una principiante con la taglia-cuci (ne possiedo una da soli 6 mesi ed essendo una Mamma Che Lavora non riesco a cucire quanto vorrei!), ma ho comunque qualche (spero) buon consiglio da condividere con Voi (dopo il tutorial sull'infilatura, che in molti avete dimostrato di apprezzare!)
Ma, prima di tutto: cos'è una tagliacuci?
E' una macchina per cucire che, come anticipa il suo nome, è in grado di rifilare e rifinire i margini di cucitura mentre cuce, in un solo passaggio, risparmiando il tuo tempo prezioso e lasciando le cuciture pulite e piacevoli da vedere.Non è difficile da usare, serve solo un po' di pratica e spero che potrai fare tesoro dei miei:
1. Acquista filato di ottima qualità
La prima volta che ho usato la mia tagliacuci, era già infilata dal venditore (Cotone n°50): tutto filava liscio finchè non ho deciso di cambiare le spolette, usando un filato in poliestere che avevo acquistato apposta per la tagliacuci, pensando fosse più resistente: niente di peggio (probabilmente la qualità non era delle migliori)!
Il filo del gancio superiore ha iniziato a rompersi e io ho iniziato a reinfilare mille volte (tutto il pomeriggio): pessima giornata, ho iniziato a pensare che non sarei stata in grado di imparare ad usare la tagliacuci in autonomia (avendola acquistata in offerta online, le lezioni erano previste per il mese successivo).
Consiglio: Io ho notato che il grande negozio a 45 minuti di auto da casa ha prezzi migliori (e qualità che si può toccare con mano) rispetto alle offerte su ebay sulle spole enormi (5-10000 yards), quindi meglio valutare due-tre posti prima di acquistare!
QUINDI: Prova a sostituire i coni di filato quando si verificano rotture continuative!

2. Scatta diverse foto dell'infilatura originale
Appena estrai la tua tagliacuci dall'imballo, aprile la "pancia" e scatta qualche foto (col telefono è perfetto, così le puoi avere sempre a portata di mano quando più ti serviranno!) prima di iniziare ad usarla: reinfilarla sarà una passeggiata!
QUINDI: non perdere tempo, scatta qualche foto!

3. Impara al più presto a reinfilare da zero
Qualuno suggerisce di iniziare ad usare la tagliacuci senza imparare a reinfilarla, semplicemente tirando i fili vecchi annodati a quelli nuovi: io ritengo sia più proficuo iniziare questa nuova relazione conoscendo bene la nuova macchina, e quale miglior modo che imparare a re-infilarla? Così sarai pronto e non spaventato nel momento in cui (e accadrà...) le cose andranno male e il filo si romperà!
MA: se sei di corsa, prova ad annodare i fili nuovi a quelli vecchi e tirare, solo non fare mai passare il nodo attraverso la cruna degli aghi, c'è il rischio di spezzarli o piegarli...
4. Con la tagliacuci non si può cucire all'indietro (per fermare il filo)
Beh, tecnicamente lo può fare, ma non penso che tu lo voglia, anche perchè taglierà tutti gli ultimi punti cuciti!
Occorre lasciare delle lunghe catenelle alla fine delle cuciture e poi fermarle in qualche modo (ho in progetto un post pieno di foto..), da non fare mai, invece, è tagliare le catenelle alla fine della cucitura (come ha fatto mia suocera con i miei Pigiamini Riciclosi quando è venuta a casa mia, ha visto le catenelle penzolare dalle maniche delLaPatata (visto che quest'ultima ha voluto indossare il pigiamino appena uscito dalla tagliacuci IMMEDIATAMENTE) o la cucitura si disferà presto!

OPPURE: puoi girare la stoffa e cucire un paio di punti nel senso opposto senza avvicinarti ai coltelli, ma non è un consiglio adatto ai principianti, credimi!
5. Non cucire sugli spilli (o almeno posizionali lontano dai coltelli)
Questa è una Regola!
Io non amo imbastire (e mia mamma quando glielo dico storce immancabilmente il naso) e uso spesso gli spilli (in effetti, adesso che uso la tagliacuci, spesso cucio senza neanche puntare gli spilli) cucendoci anche sopra con la macchina da cucire (lo so che non è il massimo, ma
Non mettere spilli del tutto(ovviamente dipende da cosa stai cucendo!)
Comunque, se usi gli spilli, tienili lontani dai coltelli o questi perderanno il filo (oppure, peggio, si romperanno!)

Riesci a vedere gli spilli? Aiuto: stanno negli ovali neri!
6. (Suggerimento risparmioso) Non occorre acquistare 4 coni per ogni colore
Quando ho iniziato ad usare la tagliacuci, ero preoccupata riguado l'enorme quantità di filato che avrei dovuto acquistare. essa infatti ne usa molto di più rispetto alla macchina da cucire, usando spesso 3-4 fili. Se stiamo cucendo, mettiamo il caso, un abito viola, non vogliamo che dalla cucitura in tensione spuntino dei punti bianchi! Per evitarlo, sarà sufficiente acquistare UNA SOLA SPOLA da 10000 yds (visto che in proporzione costano molto meno delle spolettine da 500 mt usate fin'ora) da mettere nell'ago sinistro, il più visibile dal diritto; intanto che sei in negozio, acquista del bianco, del nero e qualche colore neutrale (grigio, vcarne, rosa chiaro etc) sempre in grossi coni (da usare nell'ago di destra e nei ganci, INVISIBILI A DIRITTO). L'acquisto di grossi coni ti consentirà di accrescere la tua collezione di colori: finirai con l'avere un sacco di colori in poco tempo e spendendo relativamente poco ogni volta.In ogni caso: cucendo un golfino o un'altro capo d'abbigliamento del quale, una volta indossato, si vedano le cuciture interne (o se avete un sacco di soldi): acquistate 4 coni della perfetta tonalità di colore della stoffa da cucire!
IN ALTERNATIVA: avvolgi 3 bobine a partire dall'unico cono acquistato nel colore preciso , caricandole negli aghi e in un gancio (tieni presente che i ganci consumano la maggior parte del filato, quindi vuotano le bobine in frettissima!)

7. Crea un tuo personale Libro della Tagliacuci, usando filato di colori diversi per ogni gancio/ago e provando a variare le tensioni
Questo è un suggerimento utile: per imparare quale a quale gancio/ago corrispondano quali parti del punto è utile infilare la tagliacuci con 4 colori diversi di filato (magari corrispondenti ai colori riportati sulla macchina stessa, così è più intuitivo) e iniziare a cucire: dopo un breve tratto, variare le tensioni (registrando le variazioni effettuate) e vedere cosa accade ai punti... Imparerai così in fretta le corrispondenze tra ago/gancio e punto e quali tensioni variare per ottenere sempre, con ogni tipo di tessuto, il punto perfetto, dove il filo dei ganci si intreccia esattamente in corrispondenza del bordo del tessuto e niente sembra tirato o molle. Se vuoi fare qualcosa di ancora più furbo, annotati le 4 tensioni su un foglio, al quale appunterai un pezzo del tessuto che hai cucito e il tipo di punto: lo potrai usare come punto di partenza in seguito per impostare la macchina prima di cucire lo stesso tipo di tessuto...
Mi piacerebbe vedere qualche Libro Personale della Tagliacuci, puoi condividere le foto del tuo sul gruppo Flickr di SergerPepper.
8. Una tagliacuci va molto più veloce di una macchina da cucire (non andare a tavoletta!)
Lo imparerai nel modo peggiore se parti a tavoletta: la tagliacuci ha una velocità decisamente superiore ad una macchina da cucire e, quando raggiungi curve o, peggio, angoli, è difficile controllare la cucitura e quindi "andare fuori strada"! Essendo una tagliacuci, non solo cucirai dove non devi, TAGLIERAI la stoffa... e questo è molto più difficile da correggere!
QUINDI: chi va piano va sano e va lontano!
9. Trasporto differenziale: il mio nuovo amico!
Questo è un pilastro da cercare in una tagliacuci: significa che ci sono due diversi trasportatori di tessuto, uno davanti e uno proprio sotto al tuo piede (non al Tuo Piede, in effetti, ma al piedino della macchina!); cambiando il trapporto tra la velocità dei due si possono cucire diversi tipi di tessuto e ottenere/evitare diversi effetti (pensa all'arricciatura!): è un po' come tirare la stoffa mentre si cuce.

In genere c'è una manopola o una levetta che ti permette di varire il rapporto tra 0,5 e 2,5 (o qualcosa di simile, il mio ha un range di 0,7-2): questa è un'altra prova che si può aggiungere al proprio Libro Personale della Tagliacuci.

10. Pulisci. La. Tua. Tagliacuci. PUNTO
Non puoi cucire con una tagliacuci sporca: ho letto che è necessario pulirla almeno ogni 3-4 ore di lavoro: a causa dei coltelli che tagliano continuamente la stoffa, la tua tagliacuci diventerà presto un incubo: aghi e fili inizieranno a saltare, le tensioni peggioreranno e tutto sembrerà non funzionare a dovere. E' ora delle pulizie di primavera: apri la pancia della tua macchina, sfilala e spazzolala con lo spazzolino in dotazione, poi soffiala con un compressore (o l'aria delle bombolette, come quelle usate per pulire le tastiere del pc). Quando ti sembra sia ben pulita, passa ad oliare le giunture metalliche, poi cuci per un poco su uno straccio, per evitare di macchiare con l'olio residuo la stoffa "bella".