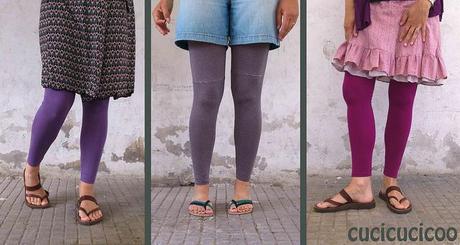
Ed ecco il terzo ed ultimo tutorial sui leggings! Servirà un cartamodello (tutorial qui) e una maglietta a maniche lunghe di un tessuto elasticizzato e si cuciono in modo molto simile a come si fa con il tessuto al metraggio (tutorial qui).
And here we have the third and last leggings tutorial! You'll need a pattern (tutorial here) and a long-sleeved shirt in some sort of stretchy fabric and you'll sew them in a similar way to how you sew leggings with fabric yardage (tutorial here).
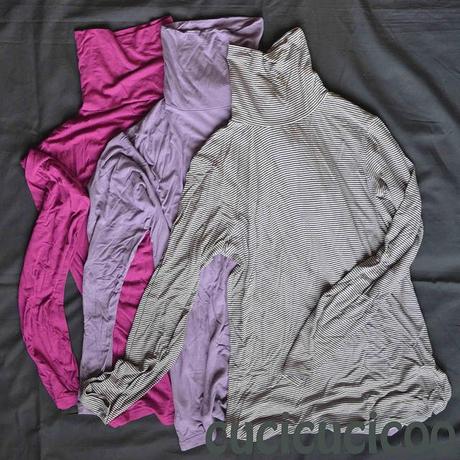
Ecco le mie tre vittime, prossime ad essere tagliate a pezzi. Le ho comprate allo stesso tempo ma le ho usate poco perché la viscosa mi faceva sudare (e puzzare. Ack!). Ma erano perfette per i leggings.
Here are my three victims, ready to get chopped up. I bought all three at the same time but hardly ever used them because the viscose made me sweat (and stink. Ack!). But they were perfect for leggings.
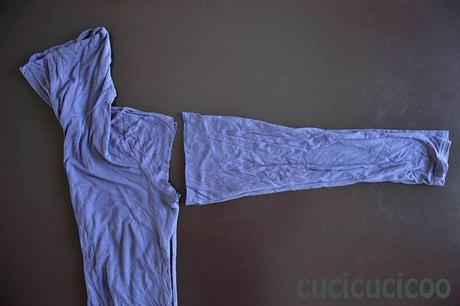
Piega la maglietta a metà, facendo attenzione che si combaciono i polsi e le ascelle. Poi taglia in verticale il più in alto possibile.
Fold the shirt in half, making sure to match up the wrists and armpits. Then make a straight cut across as high up on the sleeve as possible.
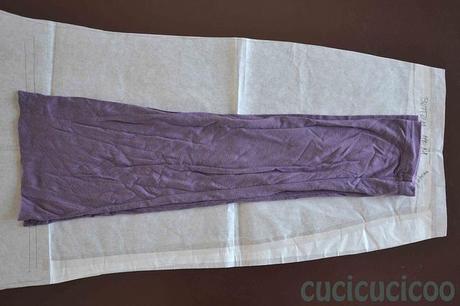
Posa le maniche sul cartamodello.
Place the sleeves on the pattern.
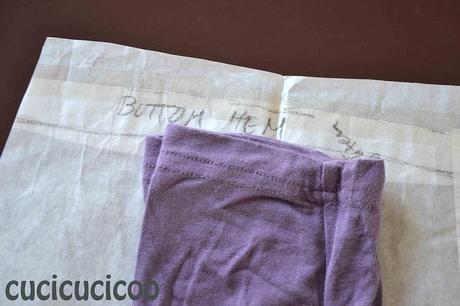
I polsi dovrebbero stare dove hai segnalato gli orli originali dei leggings che hai usato per creare il cartamodello (prima di aggiungere i margini di cucitura) perché gli orli sono già fatte.
The wrists should be lined up along the marking you made where the original leggings you used to make the pattern were (before adding seam allowances) because your hems are already done.
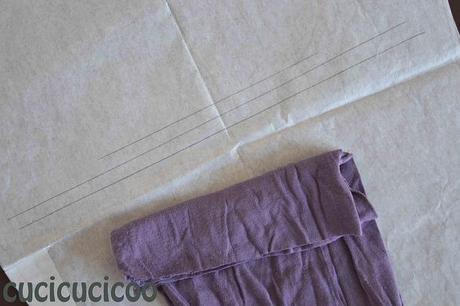
Fa un segno dove arriva il tessuto tagliato. Poi fai un'altra linea parallela 2 cm sotto. (Io ho fatto due linee, ciascuno di 1 cm, mentre calcolavo come fare, ma non c'è bisogno!)
Make a mark where the cut fabric ends. The draw a parallel line 2 cm under that. (I drew two lines, each 1 cm from the others, when I was calculating how to do this, but there's not need to do that!)
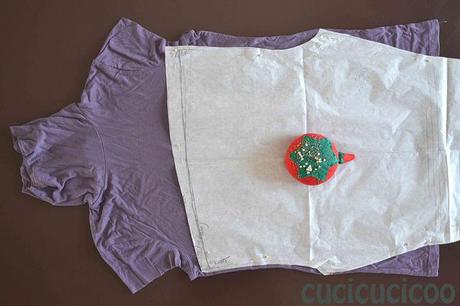
Ora posa la parte superiore del cartamodello sul torso della maglietta. Non importa se va un po' nelle maniche, com'è successo con me, perché quella parte si piegherà verso l'interno per fare il girovita.
Now place the upper part of the pattern on the shirt's torso. It doesn't matter if it goes a little over onto the sleeves, as happened for me, because you'll end up folding that part inwards for the elastic waistband.
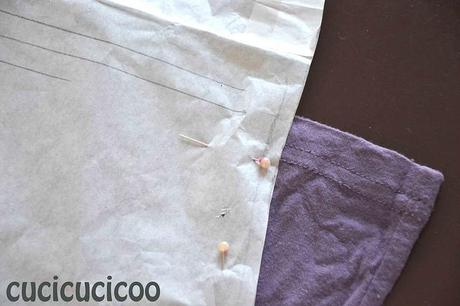
La cosa importante è di allineare quella seconda linea (o terza, nel mio caso) con la parte in basso della maglietta. Se non riesci a far entrare il cartamodello, si possono sempre togliere le cuciture e spiegare il tessuto per averne di più.
The important thing is to line up that second line (or third, in my case) with the shirt's lower hem. If you can't get the pattern to fit onto your fabric, you can always rip out the stitching and unfold the fabric to get more of it.
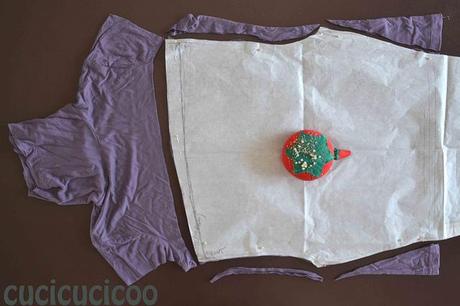
Taglia intorno alla cartamodello.
Cut around the pattern.
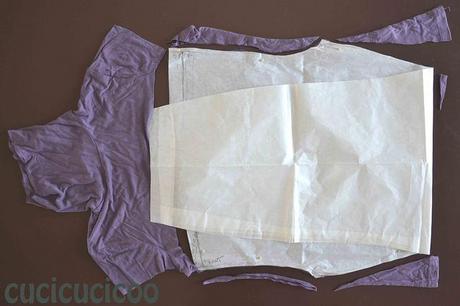
Controlla che non ci sia troppo tessuto nella parte inferiore. Per farlo, piega il cartamodello verso l'alto lungo quella seconda (terza) linea. Se ne fuoriesce qualche pezzo di tessuto, taglialo. (In questo esempio, c'era un piccolo triangolo che ho tolto.)
Check to make sure there isn't too much fabric at the bottom. To do this, fold the pattern upwards along that second (third) line. If anything sticks out, cut it off. (In this case, there was a little triangle which I cut off.)
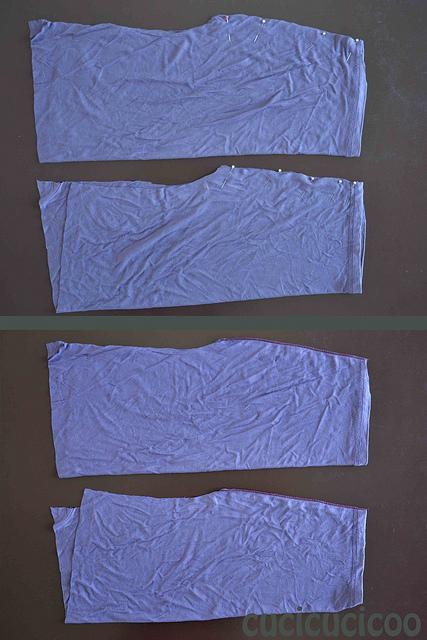
Come si fa per i leggings con il tessuto a metraggio, si devono cucire due tubi che diventeranno le gambe. Noi lo facciamo solo per le cosce. Piega ciascuna coscia a metà, con il davanti del tessuto all'interno. Si spillano fino al cavallo e si cuciono. (Uso sempre il tagliacuci, ma si può benissimo usare uno zig-zag. Basta che abbia un po' di elasticità.)
As with leggings made from fabric yardage, you need to sew two tubes which will become the legs. We'll be doing this just with the thighs. Fold each thigh in half, right side in. Pin up to the crotch and sew. (I always use an overlocker/serger, but you can also use a zig-zag stitch. Just use a stitch with some stretch to it.)
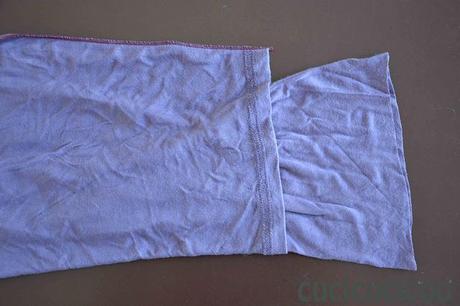
Ora si inserisce le maniche (con la parte buona verso fuori) dentro i tubi delle cosce. Le parti buone saranno a contatto.
Now slip the sleeves (right side out) into the thigh tubes (right side in). The right sides will be facing each other.
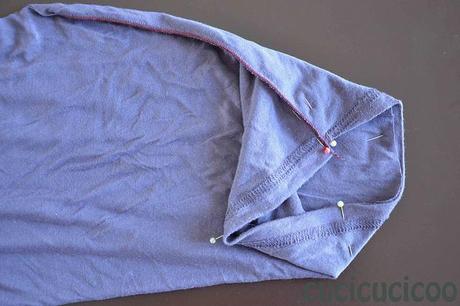
Allinea la cucitura che hai fatto tu con quella originale della manica e spilla tutto intorno.
Line up the seam you sewed with the original one from the sleeve and pin all around.
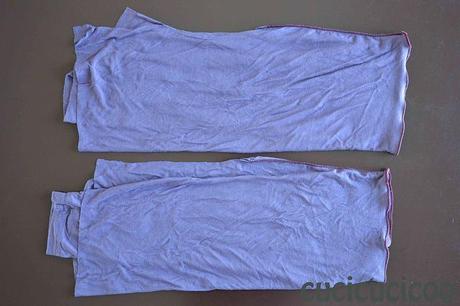
E di nuovo si cuce con qualche cucitura elastica, togliendo tutte le cuciture originali della maglietta.
And again, sew with some sort of stretchy stitch, removing all the original shirt's seams.
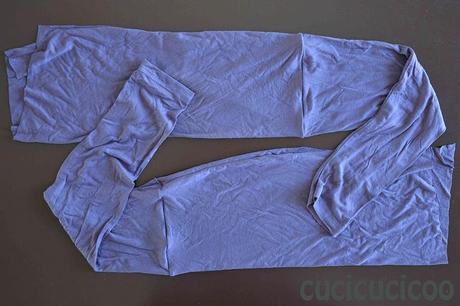
Quando togli le ex-maniche da dentro le cosce, avrai le tue nuove gambe! E' vero che si vede la linea dove si uniscono i due pezzi, ma a me non dà fastidio. (E' vero che si vede molto nella parte centrale della foto all'inizio di questo post, ma questo è perché 1) con le strisce si nota di più, 2) con il pantaloncino corto si vede di più e 3) ho sbagliato colore del filo, quindi si nota di più. Ma poi dopo ho rifatto quella cucitura nel colore corretto, e va molto meglio.) Se non ti piace, potrai sempre fare qualche applicazione di un'altro tessuto o qualcosa del genere per coprirla. Basta che sia qualcosa sempre elastica.
When you pull the ex-sleeves out from the thighs, you'll have your new legs! It's true that you can see the line where the two pieces join, but it doesn't bother me. (It's also true that you can see it very easily in the central part of the photo opening this post, but that's because 1) you notice it more with the stripes, 2) you see it more with shorts, which are shorter than the skirts and 3) I used the wrong color of thread, so you can see it more. But after I resewed that seam with the right color, it was much better.) If you don't like it, you can always sew some other fabric or something else over it to cover it. Just make sure it's stretchy.
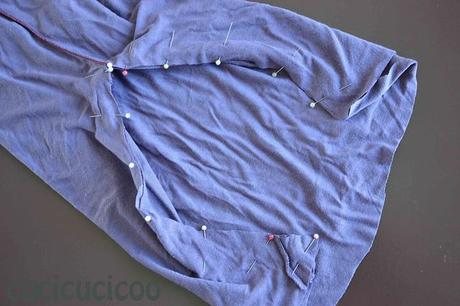
Poi si procede come i leggings normali. (Se vuoi più dettagli, guarda questo tutorial.) Si mette una gamba alla rovescia e si inserisce l'altra gamba dentro, unendo i bordi tagliati, facendo attenzione di allineare le cuciture. Si spillano e si cuciono (con cucitura elastica!).
Then continue as you would with regular leggings. (If you need more details, please take a look at this tutorial.) You turn one leg inside-out and stick the other leg inside it, matching up the cut edges, lining up the seams. Pin and sew (with stretchy stitch!).
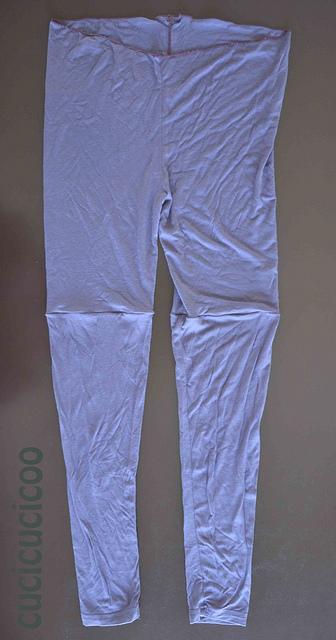
Ecco i leggings! Visto che non avevo tanto tessuto per fare i leggings lunghi come mi piacciono (e perché sono un po' altina), faccio un girovita semplice. Ho rifinito il bordo superiore con la tagliacuci (si può anche fare con lo zig zag o non farlo proprio se usi un jersey).
And there you have leggings! Seeing as I didn't have enough fabric to make my leggings as long as I would've liked them (because I'm on the tall side), I made a very simple waistband. I finished off the edge with my overlocker (you can also use a zig zag stitch or nothing at all if you're using a non-fray jersey).
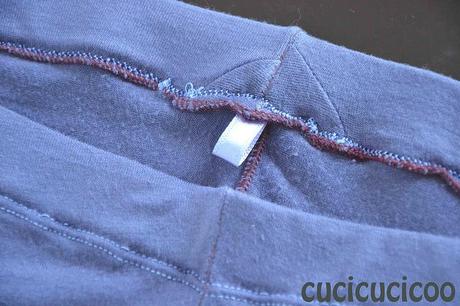
Ho cucito il canale per l'elastico con l'ago gemello (di nuovo, guarda il tutorial su come si cuciono i leggings se ti servono le istruzioni.), ho inserito un pezzetto di nastro per segnalare il retro, e ho chiuso l'apertura. Qui si vede perché non mi importava quando tagliavo una parte delle maniche; viene piegata verso l'interno e non si vede.
I sewed the elastic casing with a double needle (again, check out the tutorial on how to sew leggings if you need the instructions.), slipped in a piece of ribbon to mark the back, and closed up the opening. Here you can see why I didn't mind so much that I was cutting into the sleeves; it gets folded inwards and you can't see it.
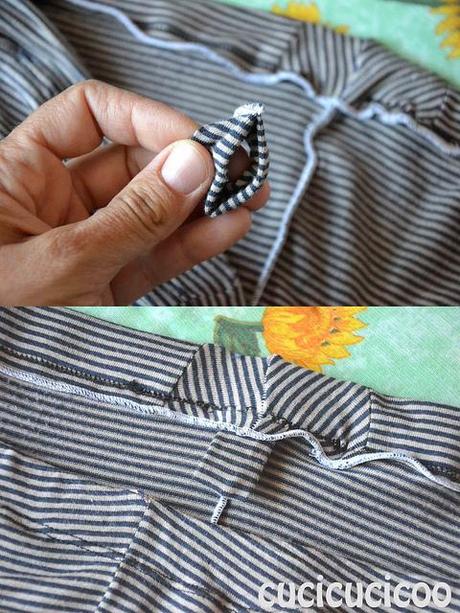
In questo caso, invece, è capitato che si vede anche all'esterno, ma non mi dà fastidio perché comunque viene coperta quella parte dal resto di quello che indosso. Qui, invece di inserire il nastro piegato, ho deciso di cucire un tubo di scarti di tessuto (tagliando un rettangolo, piegandolo a metà con la parte buona verso l'interno, cucendo per fare un tubo, girando nel verso giusto, piegandolo a metà e cucendo per tenerlo fermo) per segnalare il retro. E' un pochino più ingombrante e ci vuole un minuto in più, ma mi sembra più carino così.
In this case, you can also see it from the outside, but it doesn't bother me because it just gets covered by whatever you're wearing over it, anyway. Here, instead of slipping in a folded ribbon, I decided to sew a little tube of scrap fabric (cutting a rectangle, folding it in half right sides together, sewing it into a tube, turning it right side out and folding in half to keep it in place) to show where the back is. It's slightly more bulky and you need an extra minute to make it, but I think it looks better that way.
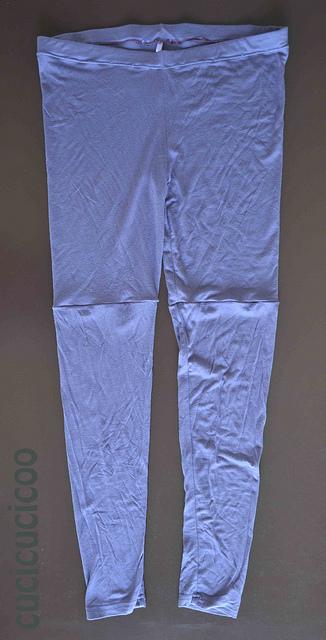
Ed ecco fatto! Leggings recuperati da qualcosa che non usavi più! Se fate qualcosa con questa serie di tutorial (o altri) aggiungete le foto nel mio nuovo gruppo di flickr dedicato alle vostre creazioni ispirate da questo blog! E verranno ancora altri tutorial presto, ma ve lo prometto, niente più leggings!! ;)
And there you have them! Leggings upcycled from something you didn't use anymore! If you sew something using this leggings series of tutorials (or others) add the pictures to my new flickr group dedicted to your creations inspired by this blog! And there will be more tutorials to come, but I promise you, no more leggings!! ;)

