By the way, this is my tutorial for you: how to easily sew a simple lined foldable Market Bag
Questo è stato il mio primo Guest Post in assoluto, scritto per il Blog di Sunae (Little Foal) un sacco di tempo fa (ecco... forse un paio di mesi??). Lo condivido oggi anche qui sul mio blog, per chi se lo fosse perso,con la traduzione in italiano (che in tante apprezzano...)!
Tornando al punto: ecco il mio tutorial, per te: come cucire facilmente una Borsa per la spesa, ripiegabile e foderata.


E in italiano no? Read me in italian
What you need:
- old bed sheets... or fabric, obviously! Two pieces about 60 cm x 120 cm
- a little piece of elastic of about 15 cm
- scissors, pins, sewing machine, thread, ruler, a pen, iron and iron board
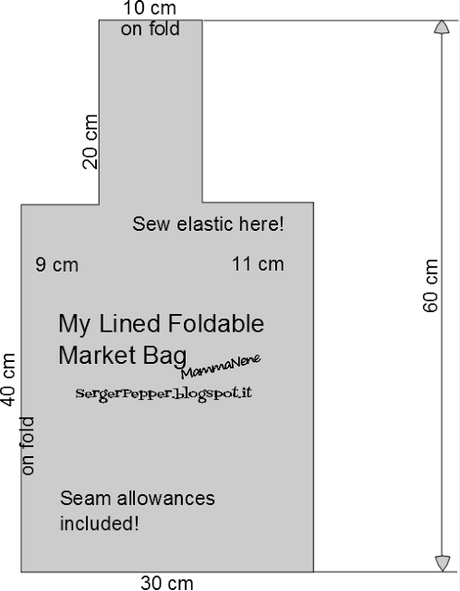
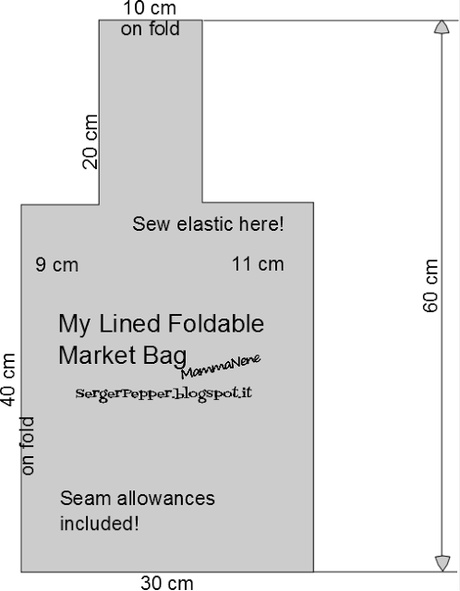
- my measure scheme:
Let's start:
Take your old bed sheets (already cut with measures above) and fold them in half and then in half again, like this: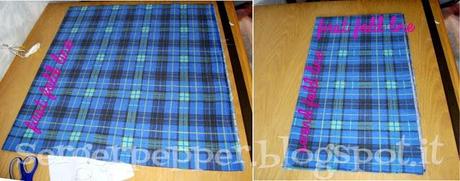
You now have a 30 cm x 60 cm rectangle!
Cut out two fabric squares (ehm, rectangles, in fact) like on the scheme and you'll obtain a strange shape, like this: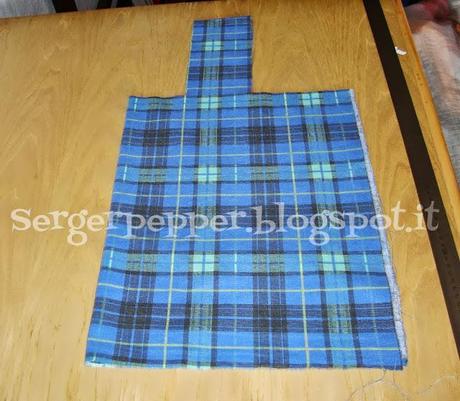
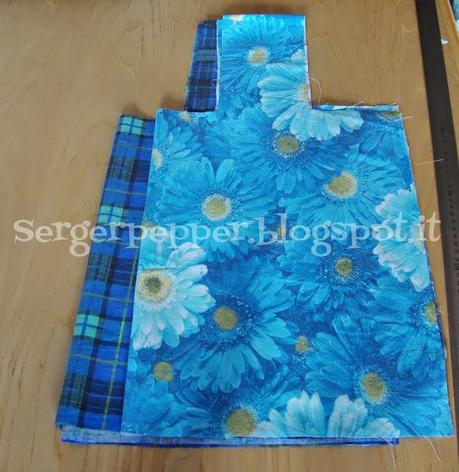
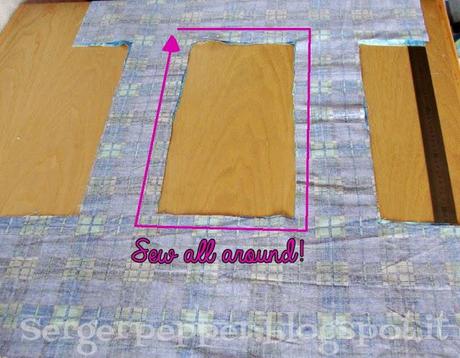
Now put the two pieces (main and lining) right sides facing and sew around the center hole, like I did (you can leave 1 cm of seam allowances, or sew leaving the feet edge as a seam allowance, like I did: it's not rocket science, you don't have to get mad about measurements!) including on the seam near one of the corners a piece of elastic you'll use to keep folded your market bag:
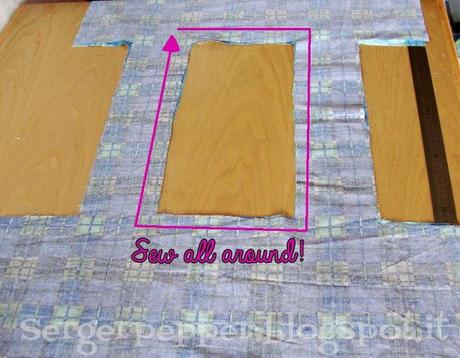
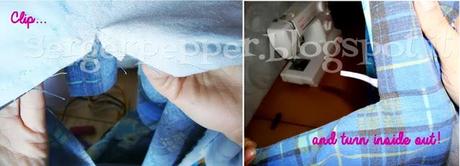
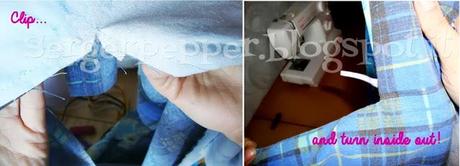
When all sewn, on corners, clip fabric until you reach the seam, BUT without cutting it!!Then turn inside out and press with an hot iron all around the seam, to give a polished not-homemade look (check how to press seams)
Now the fun part:
We have to roll one side of the market bag inside one of the handles, in order to sew together the main and the lining fabrics, ride sides facing, like this:
Let's sew, starting from one side seam, finishing to the other side seam (two 90° angles to sew and clip on corners, like we did on the center hole), then turn inside out, taking fabrics out with your hand: ta-daaa:

Press everything nicely and repeat on the other side (rolling, sewing, turning and pressing, do everything twice!)

Let's close side and bottom seams of both outside fabric and lining in one seam, right sides facing (remember, you have to leave a gap on the lining bottom, so we can reverse everything inside-out).
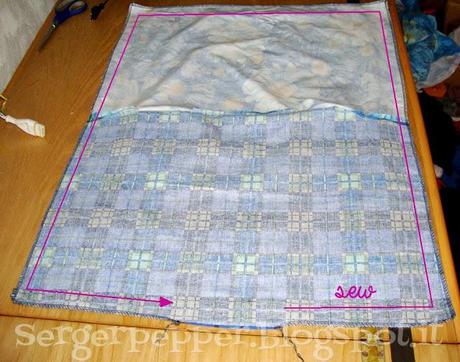
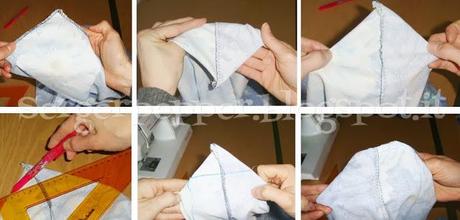
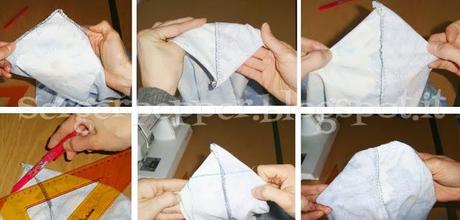
You can stop here or, if you like some boxy shape, proceed squaring corners on each one of the 4 angles, like this:
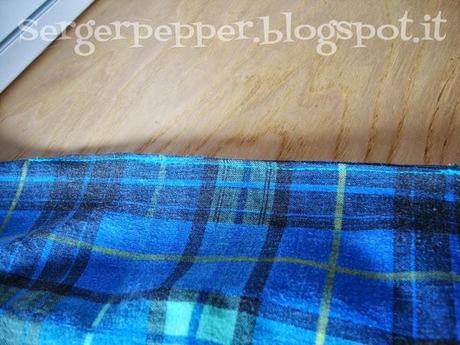
When you've turned inside out your bag, you can stitch the gap by hand or, like I did, with a straight machine stitch (lazy girl, I didn't change the thread color, but it's on the lining, who cares?)
Your Lined Foldable Market Bag is done.

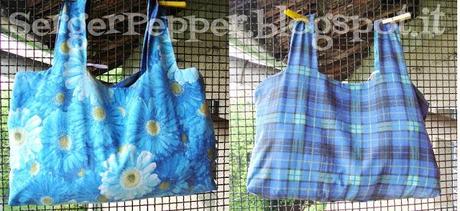
You can change measures if you like it higher and thinner, you choose, this tutorial is ok with any measure!
If you're sewing one or one hundred of these, please share them on my flickr group
You can take a look to:
- 5 min Beach Bag
- Back to School Drawstring Backpack
- Neckwarmer for the fall coming
E in italiano no? Read me in italian
Quello che ti serve:
- vecchie lenzuola ... o tessuto, ovviamente! Due pezzi di circa 60 cm x 120 cm
- un piccolo pezzo di elastico di circa 15 cm
- forbici, spilli, macchina da cucire, filo, righello, una penna, ferro e asse da stiro
- lo schema per il taglio:
Cominciamo:
Prendi le tue vecchie lenzuola (già tagliate delle dimensioni qui sopra) e piegale a metà e poi ancora a metà, così: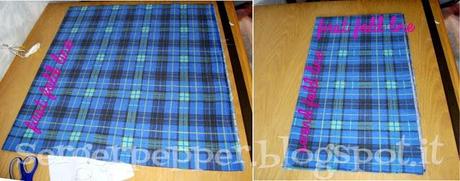
A metà e poi ancora a metà, girandole di 90°
Hai ora un rettangolo 60 cm x 30 cm!
Taglia via due quadrati di tessuto (ehm, rettangoli, appunto), come da schema, per ottenere una forma strana, come questa:
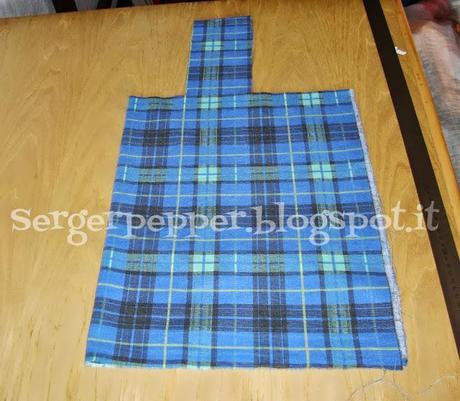
Ripeti sull'altro ritaglio di lenzuolo (esterno della borsa)
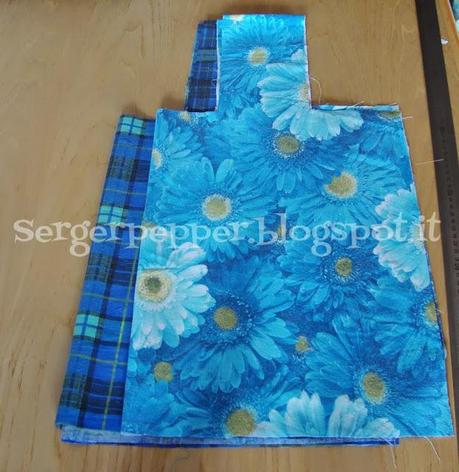
Ora metti i due pezzi (esterno e fodera) diritto contro diritto e cuci intorno al foro centrale, come ho fatto io (si può lasciare 1 cm di margini di cucitura, o cucire lasciando il margine equivalente al piedino come margine di cucitura, come ho fatto io: non è scienza missilistica, non c'è bisogno di impazzire con le misurazioni!), inserendo nella cucitura vicino a uno degli angoli di un pezzo di elastico piegato a metà, che ti consentirà di tenere piegata la borsa della spesa:
Quando hai cucito, in corrispondenza degli angoli incidi il tessuto perpendicolarmente fin quasi alla citura, ma senza tagliarla! Poi rivolta la borsa e stira la cucitura tutto intorno, per fissarla e dare un aspetto rifinito e non "fatto in casa"! (ecco i miei migliori consigli su come stirare le cuciture)
Ora la parte divertente:
Arrotola ora un lato della borsa della spesa all'interno di una delle maniglie, per cucire insieme il lato esterno dell'altra maniglia, diritto contro diritto, in questo modo:
Ora cuci, a partire da una cucitura laterale, finendo verso l'altro lato della cucitura (due angoli di 90° da cucire e incidere agli angoli, come abbiamo fatto per il foro centrale), poi rivolta il tutto infilando una mano all'interno e tirando la stoffa verso l'altro lato: ta- daaa:

Stira bene la cucitura appena fatta e ripeti allo stesso modo per l'altra maniglia (arrotolare, cucire, risvoltare e stirare!)

Ora chiudi i lati e il fondo della borsa di esterno e fodera in un solo momento, diritto contro diritto (ricordati di lasciare un tratto aperto sul fondo del lato "fodera", così da poter risvoltare la borsa da diritto!)
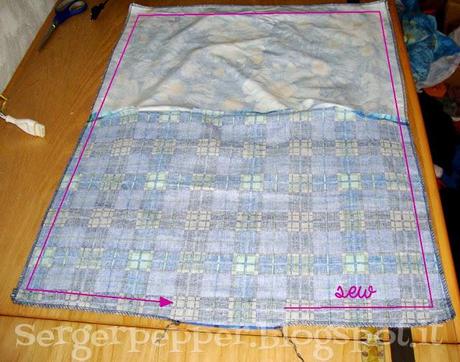
Ti puoi fermare qui, se vuoi, oppure puoi dare una forma un po' più squadrata al fondo della borsa: segui il procedimento fotografato qui sotto per ognuno dei quatto angoli!
Quando hai rovesciato la borsa, puoi cucire l'apertura a mano o, come ho fatto io, a macchina, con un punto diritto (sono una ragazza pigra: non ho cambiato il colore del filo, ma è all'interno, chi lo vede?)
La Tua Busta della Spesa, Ripiegabile e Foderata è pronta!

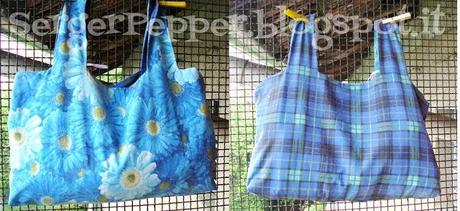
Puoi modificare a tuo piacimento le misure, se la preferisci alta e stretta ad esempio: scegli tu, questo tutorial è ok con qualsiasi misura!
Se ne cuci una o cento, condividi qualche scatto sul mio gruppo flickr: mi farebbe davvero piacere!!
Puoi anche dare un'occhiata a:
- Borsa da Spiaggia in 5 minuti
- Zainetto Back to School
- Scaldacollo per l'autunno in arrivo


