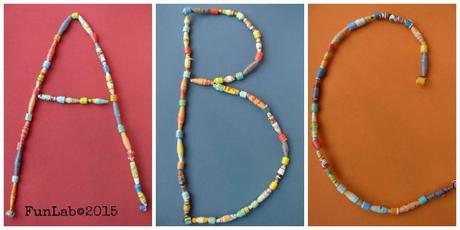
Sono sempre alla ricerca di modi per riciclare la montagna di cataloghi di giocattoli che ci arrivano ogni anno, spediti dai vari fornitori o aspiranti tali. Sono belli, colorati, di carta spesso molto buona. Ecco allora un ottimo metodo per utilizzare carta di alta qualità che volete riciclare – creare delle
perline di carta>
!
Abbiamo deciso di assemblare poi le nostre perline di carta in lettere da appendere poi nei nostri punti vendita/workshop durante la stagione del ritorno a scuola (la dimensione finale è di circa un foglio A4). Venite a vedere come è facile realizzare queste perline di carta!
Necessario:
Carta da riciclare
Forbici
Filo per creazioni artistiche
Colla
Iniziamo:
Passo 1: Cut out paper into triangles and strips. You want the trianges to be the full length of the paper so that your beads will be big enough.
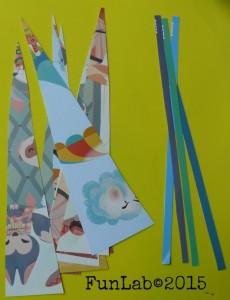
Passo 2: Use a toothpick to start rolling the triangle from the wide end.
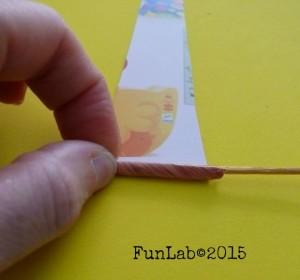
Passo 3: Keep rolling until almost all the paper is incorporated into the bead. Glue the flap.
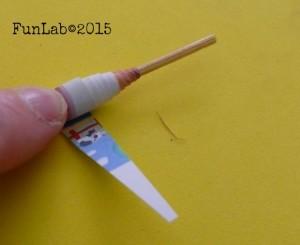
Passo 4: Press the flap onto the side of the bead.
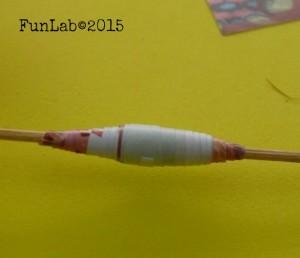
Passo 5: Keep rolling until you have beads of all shapes a sizes.
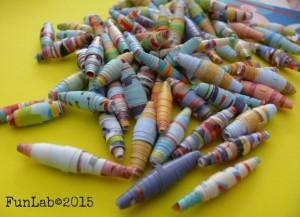
Passo 6: Cut out a length of craft wire. Slide beads onto the wire. I used beads made out of strips as a spacer. Keep going until you have filled the entire length of the craft wire.
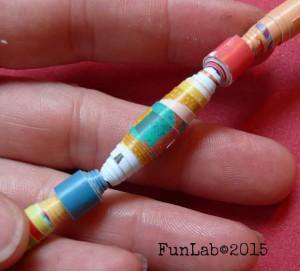
Passo 7: Depending on what letter you make you can bend the craft wire around the bottom bead to hold in place.
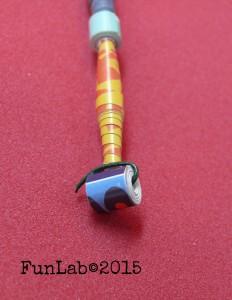
Passo 8: You can also feed the wire between multiple beads to build more complicated letters like A and B.
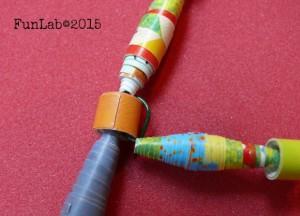
Queste lettere sono grandi ma voi potete realizzarle della dimensione che volete. Penso che lettere cosi’ grandi siano una bellissima decorazione per ogni cameretta ma anche per ogni CLASSE come lavoretti di Ritorno a Scuola!!!!
Have fun
Alison
Click here for English Version
Necessario:
Carta da riciclare
Forbici
Filo per creazioni artistiche
Colla
Iniziamo:
Passo 1: Cut out paper into triangles and strips. You want the trianges to be the full length of the paper so that your beads will be big enough.

Passo 2: Use a toothpick to start rolling the triangle from the wide end.

Passo 3: Keep rolling until almost all the paper is incorporated into the bead. Glue the flap.

Passo 4: Press the flap onto the side of the bead.

Passo 5: Keep rolling until you have beads of all shapes a sizes.

Passo 6: Cut out a length of craft wire. Slide beads onto the wire. I used beads made out of strips as a spacer. Keep going until you have filled the entire length of the craft wire.

Passo 7: Depending on what letter you make you can bend the craft wire around the bottom bead to hold in place.

Passo 8: You can also feed the wire between multiple beads to build more complicated letters like A and B.

Queste lettere sono grandi ma voi potete realizzarle della dimensione che volete. Penso che lettere cosi’ grandi siano una bellissima decorazione per ogni cameretta ma anche per ogni CLASSE come lavoretti di Ritorno a Scuola!!!!
Have fun
Alison
Click here for English Version
