Basta anelli di Newton!
Da Polaroiders
di Ale Di Gangi
[English translation below]
Dopo anni di tentativi, dubbi, ricerche a lottare contro gli anelli di Newton che si formano invariabilmente durante l’acquisizione digitale delle foto Polaroid (formato 600 e Spectra), ho finalmente deciso di elaborare un mio metodo per eliminarli definitivamente dalla mia vita fotografica e riuscire ad acquisire e ripulire le mie foto in modo facile e veloce.
Spero che le istruzioni che seguono possano essere di aiuto per altri Polaroiders; chi volesse contattarmi per idee o migliorie, può scrivermi a [email protected]
 Cosa serve:
- 1 quadrato di plexiglass dello spessore di 1mm, bianco o grigio chiaro
- patafix (in alternativa scotch da lucido della 3M)
- piedini adesivi in silicone di circa 3mm di spessore
- il cartoncino nero di un caricatore Polaroid
Istruzioni:
1. Procurati un quadrato di plexiglass dello spessore di 1mm; la misura del lato deve essere maggiore di quella di una foto Polaroid di almeno 1cm. Io uso un quadrato di 12×12.
Attenzione, consiglio di utilizare plexiglass bianco o grigio molto chiaro (io l’ho preso così), non trasparente nè colorato, per evitare riflessi di luce durante la scansione o dominanti di colore che possono influenzare sia la foto che la cornice bianca che la racchiude.
2. Compra dei piedini adesivi e rotondi di silicone, altezza di circa 3mm. Per intenderci, quelli che si trovano in dotazione anche con alcuni mobili Ikea e che servono per fermare la corsa di sportelli e cassetti. Altezze maggiori di 3mm possono allontanare la foto dal vetro quanto basta per compromettere la messa a fuoco dello scanner, mentre meno di 3mm potrebbe essere troppo poco.
Attacca un piedino di silicone a ciascun angolo del quadrato di plexiglass.
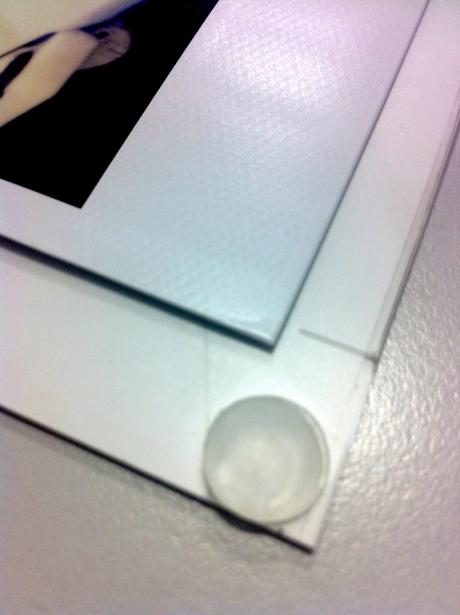 3. Attacca 4 *piccole* palline di patafix sul retro della foto da scannerizzare; attacca una quinta pallina al centro della foto, sempre sul retro, ovviamente. In alternativa, puoi usare dei piccoli cerchi di scotch da lucidi della 3M, quello del tipo “lattiginoso” che si attacca anche sulla carta senza danneggiarla quando viene rimosso.
 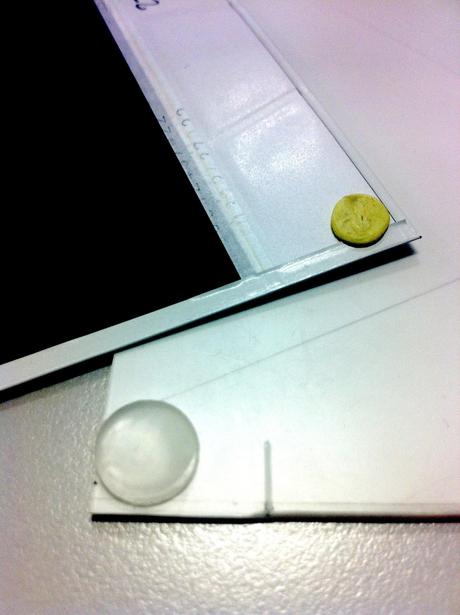 4. Adesso gira la Polaroid e fissala delicatamente al plexiglass, sul lato dei piedini di silicone. Usando il lato liscio di uno dei cartoncini neri che vengono espulsi dalla macchina fotografica all’inserimento delle nuove cartucce, premi bene sugli angoli e al centro della foto, in modo da assicurarti che la foto sia ben attaccata, in modo uniforme, al plexiglass; in questo modo i pezzeti di patafix (o gli anelli di scotch) si schiacciano e le altezze si uniformano – e non lascerai impronte sulla foto!
 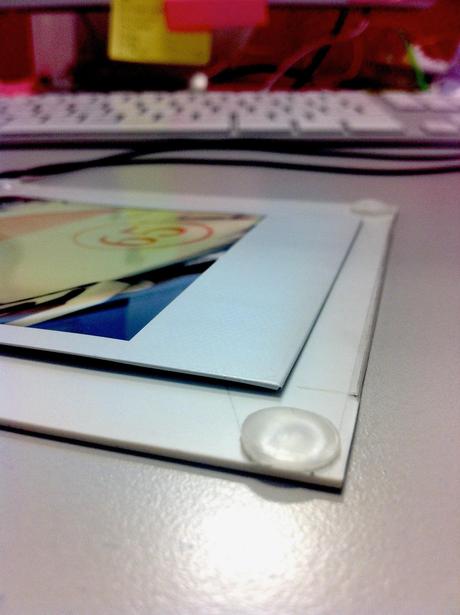 5. Appoggia quindi il supporto di plexiglass sul vetro dello scanner (dalla parte della foto e dei piedini di silicone, ovviamente), chiudi il coperchio dello scanner e procedi con l’acquisizione.
Usando questo sistema la foto non arriverà a toccare il vetro dello scanner, ma ne resterà abbastanza vicina da permettere la messa a fuoco da parte dello scanner; se anche la foto – o una sua parte – arriva a toccare il vetro, gli anelli di Newton non dovrebbero comunque potersi formare.
Per controllare che la foto sia perfettamente a fuoco, dopo l’acquisizione ingrandisci al massimo l’immagine e controlla la trama della cornice di carta.
Idee e modi per migliorare questo metodo? Fammi sapere!
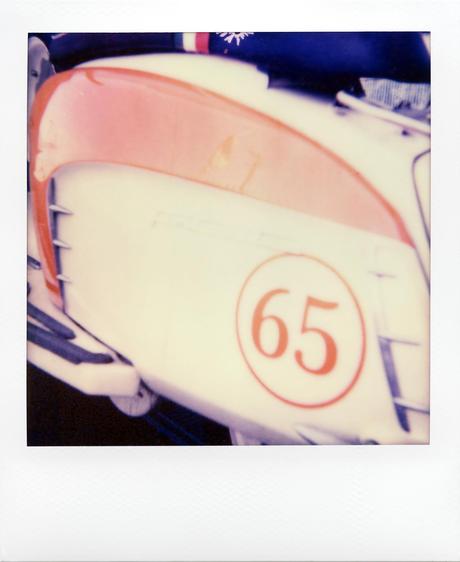
  La foto che ho usato come esempio si intitola “Lambretta 65” ed è stata scattata usando una pellicola Impossible PX 70 COLOR SHADE COOL scannerizzata con il metodo descritto qui.
© 2012 Ale Di Gangi
Il post originale (in inglese) si trova sul mio blog, all’indirizzo
http://bit.ly/NJYyhI
***
Finally! No more Newton rings on Polaroid scans!
After years spent trying to fight and get rid of Newton rings in my Polaroid scans (600 and Spectra), I finally decided to come up with my own solution and be able to digitalise my shots in a quick and easy way.
I hope the instructions that follow will be of help for other Polaroiders as well; if you have more ideas of if you can think of ways to improve this mehtod, please drop me an email at [email protected]
What you will need:
- 1 square(ish) piece of white or light grey plexiglass, 1mm thick (about 0,04”)
- patafix (as an alternative, 3M clear mounting adhesive tape, easily removable)
- adhesive silicone feets, 3mm thick (0,12”)
- 1 black carboard expelled from any Impossible cartridge
Instructions:
1. You will need a small square piece of white plexiglass, 1mm thick (about 0,04”); the square must be larger than a Polaroid photo, say at least 1cm (0,4”). I cut mine 12x12cm (about 4.73”).
Note: use only matt white or very light grey plexiglass, not clear nor coloured, to avoid reflections from the scanner light (if clear) or unwanted colour casts on the white frame of the photo when scanning.
2. Get a set of adhesive silicone feets, 3mm thick (0,12”). I would not try thicker ones since the risk here is to have the photo placed too far from the glass of the scanner and get out of focus.
Place a silicone feet on each corner of the plexiglass, as shown in the photo below.
3. Now get some good patafix and stick 4 *small* rounded pieces on the back corners of the Polaroid photo; then add 1 more in the back center of the photo.
If you prefer, you can use instead of the patafix some small rings made with 3M clear mounting adhesive tape, easily removable, it won’t damage the back of the photo.
4. Now turn the Polaroid and fix it to the plexiglass, on the same side of the silicone feet; make sure the photo is firmly attached and straight by pressing it using the first black frame of a cartridge – use the smooth size to avoid risks of scratches and fingeprints on the photo!
5. Finally, put the plexiglas piece with the photo face down on the scanner glass, close the lid and scan away at high resolution!
This way the photo won’t be able to touch the glass of the scanner, but will stay close enough to come out perfectly in focus. If you notice the resulting scan is out of focus – check by inspecting the grid of the paper frame at full res -, try with thinner silicon feets; touching the glass with the photo is not a problem here, since you only need to keep it raised enough not to let the plastic surface of the photo adhere to the glass surface and avoid the Newton rings.
I will truly appreciate your feedback and results if you try my method.
The photo on top of this post is titled “Lambretta 65” and was shot on Impossible PX 70 COLOR SHADE COOL film then scanned using the method described here.
© 2012 Ale Di Gangi
Original post at my blog at http://bit.ly/NJYyhI
Potrebbero interessarti anche :
 Cosa serve:
- 1 quadrato di plexiglass dello spessore di 1mm, bianco o grigio chiaro
- patafix (in alternativa scotch da lucido della 3M)
- piedini adesivi in silicone di circa 3mm di spessore
- il cartoncino nero di un caricatore Polaroid
Istruzioni:
1. Procurati un quadrato di plexiglass dello spessore di 1mm; la misura del lato deve essere maggiore di quella di una foto Polaroid di almeno 1cm. Io uso un quadrato di 12×12.
Attenzione, consiglio di utilizare plexiglass bianco o grigio molto chiaro (io l’ho preso così), non trasparente nè colorato, per evitare riflessi di luce durante la scansione o dominanti di colore che possono influenzare sia la foto che la cornice bianca che la racchiude.
2. Compra dei piedini adesivi e rotondi di silicone, altezza di circa 3mm. Per intenderci, quelli che si trovano in dotazione anche con alcuni mobili Ikea e che servono per fermare la corsa di sportelli e cassetti. Altezze maggiori di 3mm possono allontanare la foto dal vetro quanto basta per compromettere la messa a fuoco dello scanner, mentre meno di 3mm potrebbe essere troppo poco.
Attacca un piedino di silicone a ciascun angolo del quadrato di plexiglass.
 3. Attacca 4 *piccole* palline di patafix sul retro della foto da scannerizzare; attacca una quinta pallina al centro della foto, sempre sul retro, ovviamente. In alternativa, puoi usare dei piccoli cerchi di scotch da lucidi della 3M, quello del tipo “lattiginoso” che si attacca anche sulla carta senza danneggiarla quando viene rimosso.
  4. Adesso gira la Polaroid e fissala delicatamente al plexiglass, sul lato dei piedini di silicone. Usando il lato liscio di uno dei cartoncini neri che vengono espulsi dalla macchina fotografica all’inserimento delle nuove cartucce, premi bene sugli angoli e al centro della foto, in modo da assicurarti che la foto sia ben attaccata, in modo uniforme, al plexiglass; in questo modo i pezzeti di patafix (o gli anelli di scotch) si schiacciano e le altezze si uniformano – e non lascerai impronte sulla foto!
  5. Appoggia quindi il supporto di plexiglass sul vetro dello scanner (dalla parte della foto e dei piedini di silicone, ovviamente), chiudi il coperchio dello scanner e procedi con l’acquisizione.
Usando questo sistema la foto non arriverà a toccare il vetro dello scanner, ma ne resterà abbastanza vicina da permettere la messa a fuoco da parte dello scanner; se anche la foto – o una sua parte – arriva a toccare il vetro, gli anelli di Newton non dovrebbero comunque potersi formare.
Per controllare che la foto sia perfettamente a fuoco, dopo l’acquisizione ingrandisci al massimo l’immagine e controlla la trama della cornice di carta.
Idee e modi per migliorare questo metodo? Fammi sapere!
  La foto che ho usato come esempio si intitola “Lambretta 65” ed è stata scattata usando una pellicola Impossible PX 70 COLOR SHADE COOL scannerizzata con il metodo descritto qui.
© 2012 Ale Di Gangi
Il post originale (in inglese) si trova sul mio blog, all’indirizzo
http://bit.ly/NJYyhI
***
Finally! No more Newton rings on Polaroid scans!
After years spent trying to fight and get rid of Newton rings in my Polaroid scans (600 and Spectra), I finally decided to come up with my own solution and be able to digitalise my shots in a quick and easy way.
I hope the instructions that follow will be of help for other Polaroiders as well; if you have more ideas of if you can think of ways to improve this mehtod, please drop me an email at [email protected]
What you will need:
- 1 square(ish) piece of white or light grey plexiglass, 1mm thick (about 0,04”)
- patafix (as an alternative, 3M clear mounting adhesive tape, easily removable)
- adhesive silicone feets, 3mm thick (0,12”)
- 1 black carboard expelled from any Impossible cartridge
Instructions:
1. You will need a small square piece of white plexiglass, 1mm thick (about 0,04”); the square must be larger than a Polaroid photo, say at least 1cm (0,4”). I cut mine 12x12cm (about 4.73”).
Note: use only matt white or very light grey plexiglass, not clear nor coloured, to avoid reflections from the scanner light (if clear) or unwanted colour casts on the white frame of the photo when scanning.
2. Get a set of adhesive silicone feets, 3mm thick (0,12”). I would not try thicker ones since the risk here is to have the photo placed too far from the glass of the scanner and get out of focus.
Place a silicone feet on each corner of the plexiglass, as shown in the photo below.
3. Now get some good patafix and stick 4 *small* rounded pieces on the back corners of the Polaroid photo; then add 1 more in the back center of the photo.
If you prefer, you can use instead of the patafix some small rings made with 3M clear mounting adhesive tape, easily removable, it won’t damage the back of the photo.
4. Now turn the Polaroid and fix it to the plexiglass, on the same side of the silicone feet; make sure the photo is firmly attached and straight by pressing it using the first black frame of a cartridge – use the smooth size to avoid risks of scratches and fingeprints on the photo!
5. Finally, put the plexiglas piece with the photo face down on the scanner glass, close the lid and scan away at high resolution!
This way the photo won’t be able to touch the glass of the scanner, but will stay close enough to come out perfectly in focus. If you notice the resulting scan is out of focus – check by inspecting the grid of the paper frame at full res -, try with thinner silicon feets; touching the glass with the photo is not a problem here, since you only need to keep it raised enough not to let the plastic surface of the photo adhere to the glass surface and avoid the Newton rings.
I will truly appreciate your feedback and results if you try my method.
The photo on top of this post is titled “Lambretta 65” and was shot on Impossible PX 70 COLOR SHADE COOL film then scanned using the method described here.
© 2012 Ale Di Gangi
Original post at my blog at http://bit.ly/NJYyhI


