ilsolleticonelcuore.blogspot.it
Salve a tutte/i Finalmente in questo fine settimana sono riuscita a finire il cappellino!!
Purtroppo il tempo è stato poco in questo ultimo periodo così ci ho messo una vita! Pero' eccolo!
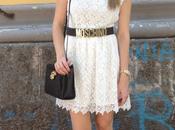
Sono piuttosto soddisfatta , presto arriveranno foto decenti ... questa è giusto per mostrarvelo ( tra l'altro e' in bianco e nero perche' mi vergogno del mio make up troppo naked hihihihi ) e il tutorial per le piu' creative. Intanto aggiungo anche il nuovo cartamodello rivisto , infatti dopo aver fatto il primo campioncino ho dovuto rivedere qualche cosa perche' il risultato non era soddisfacente. Per cui alle piu' creative lascio questo breve tutorial sulla realizzazione del cartamodello.
un bacione e spero che vi piaccia =)
Come sempre lasciate un segno del vostro passaggio con un commento , così avro' modo di ricambiare ^^
Hello to all I finally finish the hat this weekend ... happy!!
Unfortunately i had a little in recent times so i've spent a lot of time to do it! But 'there it is!
I'm pretty satisfied, decent pictures coming soon ... this is just to show it (by the way, 'black and white' cause I'm ashamed of my make up too naked hihihihi) and the tutorial for more creative followers. Meanwhile, add the new revised pattern, in fact after the first sample I had to change anything 'cause the result was not satisfactory. So i leave this short tutorial for my creative followers on the implementation of the pattern.
a kiss and I hope you like it =)
As always leave a sign of your passage with a comment, so i'll put one to yours of course ^ ^


Istruzioni per il cartamodello:
Creazione degli spicchi:Disegnate come in figura uno spicchio con base circonferenza testa + 10 diviso 8 alto 18 cm.come vedete in figura la base e' piu' stretta , per poi allargarsi a circa cm 6 di circa 3,5 cm in piu' della base.Spicchi da posizionare su tessuto per 8 volte.
creazione della base rettangolare:disegnate un rettangolo della larghezza testa piu' 10 segnatevi il centro e le larghezze degli spicchi in modo da avere dei riferimenti quando cucite.dal centro segnatevi dei riferimenti della larghezza visiera che sara' 22 segnatevi alle estremita' la posizione elastico a circa 5 cm per parte.L'elastico da utilizzare sara' 4 cm , per un tiraggio di 6 cm.
creazione della visiera:
disegnate un rettangolo di base 19.5 per h 10,5dal centro alto abbassatevi 3 cm circa , disegnate ora la forma come in figura , smussando gli angoli e sagomando la visiera.Ricalcate la visiera e createne una piu' piccola di un centimetro nella parte dove andra' attaccata al rettangolo del cappello.Ne servono 2 pezzi.
Rinforzo Visiera.Come vedete in figura il rinforzo visiera e' sagomato , in modo da ottenere un movimento verso il basso visto che noi non possediamo il rinforzo preformato industriale.sulla meta' della visiera disegnate un segmento dritto e poi sulla meta' di questo segmento uscite di circa 5 mm per parte , ricavate come in figura.Per la visiera vi suggerisco un materiale rigido.
Fodera da ottenere con lo stampo degli spicchi.rettangolo aggiungere flisellina adesiva per maggior sostegno.Rinforzo materiale abbastanza sostenuto , io ho utilizzato una flisella tessuto non tessuto abbastanza rigida e pesante.
cartamodello testato e garantito , forza creative! soprattutto le mamme , avanti regalate un simpatico cappellino ai vostri bimbi , potete personalizzarlo con dei motivi particolari e renderlo veramente unico.Alla prossima per il tutorial how sew!
Instructions for the pattern:
Creating colves:Drawn as in the figure with a clove base head circumference+ 10 divided by 8 , 18 cm high.As you can see in the figure the base is more narrow, then widens to about 6 cm of 3 to sideCloves to be positioned on fabric for 8 times.
creation of the rectangular base:draw a rectangle like the width of the head , add 10 cmtake note of the center and width of the segments in order to have references when sewn.make a note of the references from the center of the width visor that will '22 cmmake a note of the extremities' the elastic position about 5 cm on either side.The elastic will be used'4 cm, 6 cm for draft.
creation of the visor:draw a rectangle with width 19.5 to 10.5 highfrom the center high crouch approximately 3 cm, drawn now form as in the figure, by chamfering the corners and shaping the visor.Modeled the visor and creating a more smaller than a centimeter in the part where going rectangle attached to the hat.need two.
Reinforced visor.As you can see in the figure the reinforcement visor is shaped, so as to obtain a downward movement seen that we do not possess the reinforcement preformed industrial.on half of the visor draw a straight segment and then on the half of this segment outputs of about 5 mm to side, formed as in Figure.For the visor I suggest a rigid material.
Lining to be obtained with the mold of cloves.rectangle add VCE fiber adhesive for greater support.Reinforcement material supported enough, I used a non-woven fabric pretty stiff and heavy.
pattern tried and tested, creative go! especially the mothers, given away on a cute cap to your children, you can personalize it with details and make it truly unique.In the next tutorial how to sew it!