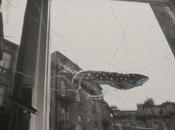
Oggi finalmente ho l'occasione di mostrarvi uno dei miei acquisti nella giornata del vintage "al kilo" al TBar in via Ostiense. Si tratta di una clutch carinissima per la quale è stato amore a prima vista. La stoffa tapestry la rendono vissuta e romantica ed era così leggera che è costata praticamente zero nel mio bottino.
Era messa un pò maluccio, mancava una bacchetta di madreperla e il manico si era spezzato, così ho pensato di recuperarla a modo mio, vi mostro subito come:
In merceria, mi sono procurata delle perline che potessero andar bene con lo spessore della cornice della borsa e una catenella dello stesso colore della chiusura e che stesse bene con questi colori delicati.
Ne è servita pochissima, perchè io ho preferito trasformarla in una borsa a mano, qualora vogliate farne una tracollina più lunga potete prendere le misure e acquistarne qualche centimetro in più.
Con una pinzetta ho grattato via i residui di colla utilizzandola come fosse un raschietto poi ho applicato un adesivo per plastica ed ho utilizzato la pinzetta per applicare una ad una le perline di lato, in modo che non si vedessero i buchi per le applicazioni col filo.
Con l'aiuto di una troschessa o di una pinza allentate gli anelli ai quali era ancorato il vecchio manico, in modo da poter inserire il nuovo. Appena finito, ripristinate la loro configurazione originale.
A questo punto, avrei potuto sostituire anche l'altra bacchetta con le perline, ma mi piaceva il gioco di contrasti che si era creato tra diverse forme, così per rendere più simmetrico il disegno, ho effettuato lo stesso lavoro dal lato opposto della borsa, incrociando perline e bacchette. Che ve ne pare?
Today I finally got the opportunity to show you one of my purchases from "ILIKEKILO" vintage sunday. This is a cute clutch for which it was love at first sight. The tapestry fabric makes it lived and romantic and it was so light that cost virtually zero in my booty.
It was putting a little lily , lacked a wand of pearl and the handle was broken, so I decided to retrieve it my way, I'll show you now how to:
In haberdashery, I've got some of the beads with the same bag thickness frame and a chain that could be comfortable with these soft colors .
It is served very little , because I preferred to turn it into a hand-bag , if you wish to make a longer shoulder strap , you can take measurements and buy a few more inches .
With tweezers I scraped off the glue residue was using it as a scraper then I applied an adhesive for plastic and I used the tweezers to apply the beads.
With the help of a tongs clamp rings to which was anchored the old handle, in order to insert the new. When you finished, reset to the original configuration .
At this point , I could also replace the other wand with beads, but I liked the play of contrasts that had been created between the different forms, so to make it more symmetrical design, I have done the same job on the other side of the bag, crossing beads and rods. What do you think?