Hello my dear friends! After my first recipe Muffin chocolate&banana (in collaboration with my friend Palma Di Francia) I decided to create Gourmet Delights, a new section dedicated to food. They are looking for special recipes, delicious, original and also traditional. Italian and international recipes! That’s why, in addition to post my culinary creations, I’ll search in the world of bloggers fantastic recipes to share!
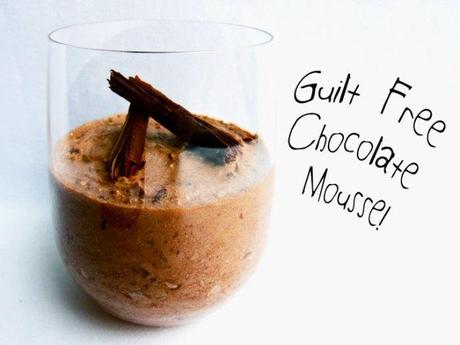
Here is the reciepe Guilt-Free Chocolate Mousse“made with coconut cream instead of dairy, you won’t feel guilty after eating the whole bowl” (Chiara Ferragni)
Buongiorno my friends! Dopo la mia prima ricetta Muffin chocolate&banana (in collaborazione con la mia amica Palma Di Francia) ho deciso di creare Gourmet Delights, una nuova rubrica dedicata al food. Sono alla ricerca di ricette particolari, deliziose, originali e anche tradizionali. Ricette italiane e internazionali! Per questo oltre a pubblicare le mie creazioni culinarie, cercherò nel mondo dei bloggers ricette fantastiche da condividere!
Ecco la ricetta Guilt-Free Chocolate Mousse “fatta con crema di cocco invece del latte così resta più leggera e non ci sentiremo in colpa dopo aver mangiato tutto il recipiente” (Chiara Ferragni)
Serves 4
2 cans full fat coconut milk, chilled in the fridge
4 Tblsp super fine sugar (caster sugar)
10 Tblsp cocoa powder
2 Tblsp melted dark chocolate (about 50g)
2 tsp coffee extract (or 2 tsp strong espresso)
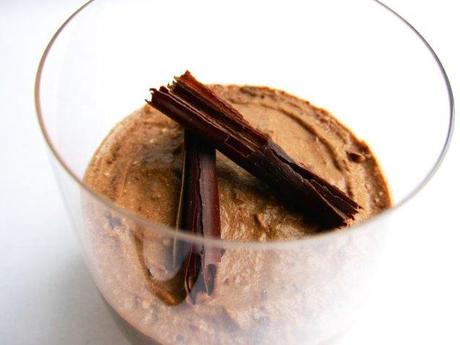
1 bar of dark chocolate for chocolate shavings on top
1. Place the coconut cans upside-down in the fridge for 2-3hours. Remove from fridge and without flipping them right-side up, open them from the bottom with a can opener. Pour out the clear coconut milk. You will be left with a thick coconut cream at the bottom! Scoop the coconut cream into a large bowl.
2. In a standmixer, or with electric beaters, beat the coconut cream until light and fluffy. Add the sugar and cocoa powder, one tablespoon at a time. Add the coffee extract (or espresso if you don’t have coffee extract).
3. In a microwaveable bowl, melt the chocolate until smooth. Allow to cool 2 mins.
4. Slowly add the melted chocolate to the large bowl of coconut cream. As the melted chocolate hits the cold coconut cream, it will harden, and you will get little chunks of chocolate in the mousse. Yum!
5. Spoon the mixture into glasses or bowls, and chill in the fridge for 1 hour.
6. To make chocolate shavings for the topping: scrape the sharp edge of a large knife across the smooth side of a chocolate bar, pressing down firmly. Don’t cut the chocolate! The knife will be slightly at an angle against the chocolate bar, as you pull along the chocolate bar creating little chocolate shavings. Place these on top of the mousse.
Per 4 persone
2 lattine intere di latte di cocco tenute al fresco in frigo
4 cucchiai di zucchero
10 cucchiai di cacao in polvere
2 cucchiaini di estratto di caffè (o 2 di espresso molto forte)
Un po’ di cioccolato fondente a scaglie da mettere sulla parte superiore
1. Mettete in frigorifero per 2-3 ore le lattine di latte di cocco capovolte. Toglietele dal frigo senza aprirle dal lato, ma aprendole dal fondo con un apriscatole. Versate il latte di cocco, vedrete sul fondo una crema di cocco molto densa! Mettete la crema di cocco in un recipiente molto grande.
2. Con un robot da cucina, o con le fruste elettriche, montate la crema di cocco fino ad ottenere un composto soffice e leggero. Aggiungete lo zucchero ed il cacao in polvere, un cucchiaio alla volta. Aggiungete l’estratto di caffè (o caffè espresso).
3. Fondete in un recipiente per microonde il cioccolato fino ad ottenere un composto omogeneo. Lasciare raffreddare poi per 2 minuti.
4. Aggiungete lentamente il cioccolato fuso nella ciotola della crema di cocco. Al contatto con la fredda crema di cocco il cioccolato si indurirà, otterrete così tocchetti di cioccolato all’interno della mousse. Gnam!
5. Versate la miscela in bicchieri o tazze e far raffreddare in frigo per 1 ora.
6. Fare le scaglie di cioccolato per la guarnizione: raschiare il bordo laterale della barretta di cioccolato con un coltello ben affilato, premendo con forza verso il basso. Attenzione a non tagliare il cioccolato mi raccomando! Il coltello dovrà essere posizionato leggermente ad angolo rispetto alla tavoletta di cioccolato, strisciarlo lentamente sulla superficie creando piccole scaglie di cioccolato e dopo riporle sulla superficie della mousse.

